Have you ever wanted to snap a picture of something cool or interesting you saw on your Mac? Say you want to show something you saw to a friend or colleague? Or maybe you are trying to troubleshoot an issue and the representative is having trouble understanding what you are saying. Whether you are new to the Mac, or a grizzled veteran just sharpening your skills, we’re here to provide some guidance, and maybe teach you something you didn’t already know.
Taking screen shots on the Mac is really easy. There are a few ways to accomplish the basic task, and a few hidden gems to really make your shots stand out. Let’s start with the basics.
1. Taking a shot of your entire screen.
If you just want a down and dirty, quick and easy full screen image of what’s on your screen, hold down the Command + Shift keys, and then hit the 3 key. This will take a screenshot of your screen (and any additional screens you may have connected to your Mac) and place them on your desktop in a PNG image format.
If you simply want to copy a screenshot to your Mac’s clipboard for pasting into a working document like Word or Photoshop, add the Control modifier key to your original Command + Shift keys, then hit 3. This avoids creating a file on the desktop and instead sets you up to use the paste command to paste the image into your document. (This only copies your Mac’s main screen however, so no secondary screens will be pasted.)

2. Taking a shot of a section of your screen.
What if you just want to grab a section of the screen instead of the whole thing? No problem. The process starts out the same. Start by holding down the Command + Shift keys, only this time instead of the 3 key, hit the 4 key. You’ll notice the Mac’s cursor has changed into a crosshair with an x y label letting you know which pixels you are selecting on the x and y axises. This is great for grabbing sections of an image or website or just to cut down on the file size of your image when you need only a piece of the screen. You can use the Control modifier key in the same way we described earlier to copy this section straight to the clipboard for pasting later as well.
While this is super great and convenient. I often find that if you are trying to grab a window that contains what you need, it can be difficult to line up the exact borders to get what you want. Well, Apple thought of that and here is the cool trick you may not know about. After you’ve hit the 4 key and have your crosshairs up, hit the space bar. Notice the cursor changes again from the crosshairs to a camera. As you move the camera around on the screen, the windows you hover over highlight indicating that if you click the highlighted window, the Mac will grab just that window. It looks great and presents much better than using the crosshairs to grab the window you wanted to show.

3. Additional methods
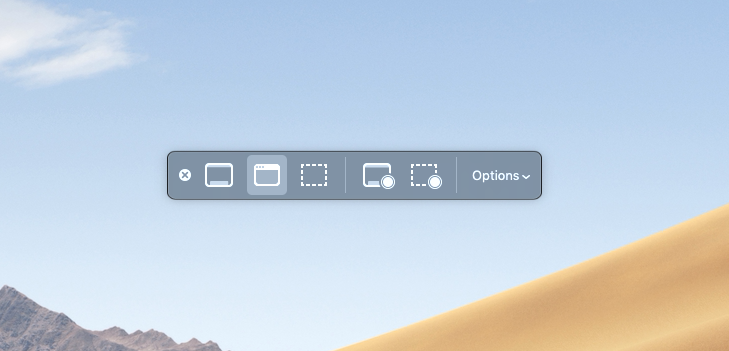
Up until macOS 10.14 Mojave, Apple provided the Grab application as an additional way to create screen shots which provided some additional options like the ability to add a timer to your shot, and a GUI for you to set up your screen shot options. Starting with Mojave however, Apple has retired Grab.app in favor of an additional keyboard shortcut. Just as with the previous methods detailed above, you can now access the features that were found in Grab.app just by holding down the Command + Shift keys, and then choosing the number 5. Another feature they added is the ability to record video instead of just one image at a time. So if you wanted to illustrate a sequence of events rather than a single snapshot, you can do that as well. This feature still exists separately in QuickTime Player, but having it present in the screen shot toolkit is a useful and welcome addition.
This covers the built in methods of grabbing screen shots on the Mac. For more advanced screen shooting, I recommends TechSmith’s excellent SnagIt and Camtasia applications to do things like take screenshots of web pages that can scroll down and get the whole page whether it’s on your screen or not with SnagIt. Camtasia adds a lot more options to your video recordings and can zoom in on sections, give customized click actions, and a whole lot more. Be sure to check them out if you are looking to go even deeper! We’ll also cover screen shots on iOS for you iPhone and iPad users in another video.
Thanks for checking this out and stay tuned for more!


Comments are closed